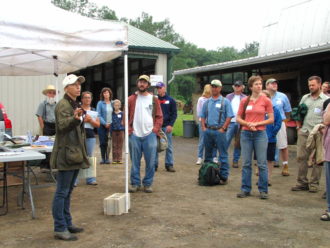
You can increase the learning value of your field day by video recording key aspects of it and sharing your video through social media. A video does not need to be professionally produced to be useful to other farmers and ranchers, but if you decide to record, it is helpful to keep in mind a few basic tips and have a plan, especially if you are new to recording outdoor events.
As with many aspects of planning a field day, consider reaching out to your local Extension agent or technical advisor, as they may have experience producing videos in a field-day setting. You might also consult with your university’s or department’s communication office.
Video Strategies
No budget to hire a videographer, no DSLR camera? No problem. Mobile devices like smartphones and tablets are capable of capturing good-quality video. Tips worth mentioning up front include:
- Have a story in mind before you start shooting video.
- Always hold your device in horizontal or landscape orientation. Never hold it in vertical or portrait orientation.
- Use a tripod or other stabilizer if possible.
- Check your batteries and storage space ahead of time.
- Get close to your subject.
- Video of people doing things is more interesting than video of people speaking.
- Record more footage than you think you will need.
- Use plenty of light. For video, morning and late afternoon light is ideal and less intense.
- Keep the background simple and keep in mind lighting and where/what you want to draw attention to and where/what you don't.
- Keep content professional. For example, if you are filming tips for packing produce or there is a scene in your packshed, check-in with your workers too. Are folks wearing close-toed shoes, relevant protective equipment and clothing for the task? And as much as we all may love to be barefoot in the fields, feel the soil tickle our toes, what might this communicate about food and worker safety?
- The Rule of Thirds - this where you imagine your frame divided in thirds. You want to avoid having your subject in the center of the frame. Place your subject’s head a little higher (not at the center) of the frame and give them visual breathing or walking space when facing the sides. Also, having a foreground and a background to create depth within a scene is crucial.
There are many websites that offer in-depth tips on recording with a mobile device, covering such areas as lighting, zooming and framing. Search the internet for "video best practices," "recording outdoor video with a mobile device," or a related term.
Audio Strategies
Like lighting, sound quality can make or break a video. Most viewers are willing to watch a video that may look a little fuzzy or grainy, but bad audio is enough to turn viewers away within a few seconds of hitting play. Smart phones and tablets are capable of capturing high-quality video, but a device's ability to capture quality audio is limited, especially in outdoor conditions (such as when it is windy or the speaker is too far away from the camera). If you have access to an external mic, excellent. If you don't and are using your phone, be mindful of the wind and background noise and adjust the scene accordingly.
If you are unfamiliar with your recording device or have not used it for a field day before, it may be a good idea to take a partner to some of the locations where you will be speaking and test out different recording situations. During the field day it may be necessary for your videographer to stand close to you while you are giving your presentations. An alternative would be to step aside for a few minutes during the field day to let a technical advisor interview you about your key messages. Another alternative, if you have the time and ability to edit the video, is to record the visuals during the field day and narrate the audio later (a “voiceover”). Video editing apps and software programs typically include features for reducing background noise, which can be helpful in this situation, and they allow you to record voiceovers.
There are also a variety of inexpensive external microphones available. A directional “shotgun” mic that attaches to your device can pick up a speaker better than the internal mics on most devices, and lapel mics that you attach to speakers before their presentations are available.
Video Length and Editing
The video does not need to document the entire event, but rather should cover the key messages and most interesting visuals. Short is good—for example, a video of five to 10 minutes can capture a lot of technical information and is more likely to be watched in its entirety than something much longer. If your aim is to create a video that is more inspirational than technical, two to three minutes is appropriate.
Almost every Windows user has access to Microsoft's free Windows Movie Maker video-editing software, since it comes preinstalled on most Windows PCs. If you are a Mac user, you can edit clips into a single movie even more easily with iMovie, which comes preinstalled on every Apple PC. You can always take advantage of the free YouTube Video Editor, for helping streamline your masterpiece.
You can find and download lots of free multimedia content from the Web, including audio clips for your soundtrack and full-length videos that you can cut and edit as you please. The lion's share of such content comes from two sources: the public domain and the Creative Commons. The Creative Commons website has an excellent search tool that lets you find works with Creative Commons licenses across various websites, including YouTube and the Wikimedia Commons.
Using Photography
An equally useful approach—though it would require its own time investment—would be to take many photos of the event and use them to create a narrated video presentation.
Sharing Your Video
The most common way to share your video is by uploading it to YouTube. From there, you can embed it on your website or share it to social media sites such as Facebook or Twitter. Instructions for taking all of these steps are readily available on the internet. When uploading your video to YouTube, it is critical to include a well-crafted title and description, and to make use of targeted keyword tags. Including key words and phrases in the title, description and tags will improve the likelihood that people will find your video on their own. Tags are words or short phrases that best capture the content of your video and help match it to relevant terms that people use when searching YouTube, Google or other search engines. Do not use an excessive number of tags or ones that are irrelevant to your video.
Watch this video for a basic description of how to upload a video to YouTube. Note that you must have a YouTube account in order to upload videos to the site.
Captioning Videos for Accessibility
In order to meet ADA compliance requirements, videos should include captions. But, adding captions to videos has benefits that extend beyond accessibility. Captions can boost the amount of time a viewer stays engaged with a video, enable viewers to watch videos on mute (a common practice), and help videos perform better on search engines.
The nonprofit organization Amara brought a team together to compile the best captioning and subtitling tools available. Their resource "11 Free Tools to Make Your Video Captioning Process Easier!" covers several widely available tools for captioning videos.